To record a meeting in the Teams app, follow these steps:
- Start the recording
At the top of the Teams app, click on the three dots (“More”).
Hover over the “Record and transcribe” button.
Click on the “Start recording” button (see Figure 1).
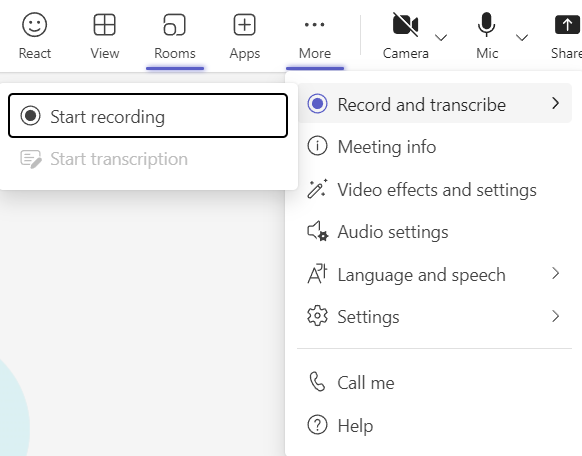
Figure 1. Meeting recording
Notes:
- Only one meeting recording can be done at a time.
- The recording is stored in the cloud and accessible to all participants.
- Whiteboards and shared notes are not included in the recording.
- When viewing the recording, no more than four video streams are visible at once.
- If the person who started the recording leaves the meeting, the recording continues.
- The recording automatically stops when all participants leave the meeting or after four hours if someone remains connected.
- The recording is automatically saved in the OneDrive “Recordings” folder of the person who started the recording and is displayed in the meeting chat.